Let’s create something better together.

If you prefer phones, we have one of those too: +1 978 455 4515


    • Project Info
      icon
    • Technology
      icon
    • Contact Details
      icon


      BackNext


      Back

      • May 2018
      • PHP

      Composer In PHP: Installing On Ubuntu & Use Case

      Composer is an application package management tool which is used only for PHP language. It provides standard format of library structure with dependencies of PHP version. We can also called it library provider. It’s also used for dependencies manager for PHP.

      Installation Steps:

      First check composer is already installed on the system or not,

      Steps to check:-

      -> Go to command prompt

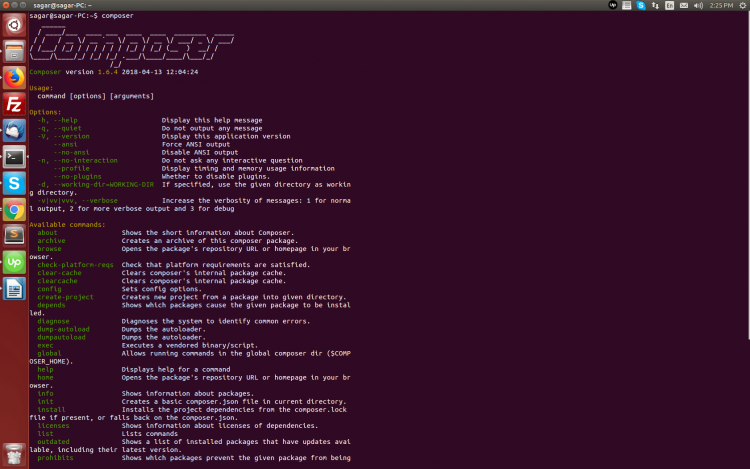
      Type command “composer”

      => You can find output like below. If you get the result like below it means composer is already installed in your system.
      use case php installing

      Composer is Not Installed:-

      => If your system has not installed composer, then output will be like below.
      ubuntu use case php installing

      If the system doesn’t have Composer, then first install composer

      Steps to install Composer:-

      => sudo apt-get update
      => sudo apt-get upgrade

      => curl -sS https://getcomposer.org/installer | sudo php — –install-dir=/usr/local/bin –filename=composer

      Once the command runs successfully, the composer is installed on the system.

      donot run composer as root

      Composer installation is done now. Now you can use composer for installation of your modules.

      What Is The Use Of Composer?

      -> Composer manage dependencies of PHP on it’s own, so the developer doesn’t have to worry about different version dependencies. This composer concept is not new, in fact it is inspired by NPM NodeJS. Composer is good for code reusability. Maintain dependencies of whole project.

      -> For composer use in your project. There are 2 main requirements

      1) Composer should be installed on the system
      2) In the project folder composer.json file must be available.

      -> In the project folder in command prompt and run command “composer install”.

      If composer.json file is not there, then you can directly install your library using command “composer require “{Package Name}”” Package name Like :” paypal/rest-api-sdk-php:*””. It will auto generate composer.json file in the system.

      After installing the packages, check the project folder. It should have created one new folder, named with “vendor”. Folder name is permanent, and it will move all packages which were installed in the project to vendor folder. Inside the vendor folder you can see “autoload.php” file.

      Autoload file will be helpful in the projects. You can include autoload.php file in your code file and get access to any package by class name to get it work.

      In your project using below steps:
      -> mkdir “Project name”
      -> cd Project name
      -> Run composer command “composer require “paypal/rest-api-sdk-php:*””

      Note: This command will create new composer.json and composer.lock file and vendor folder that includes all the dependency and library files of the installed packages.

      -> Autoload.php file is in vendor folder. Use the file name (autoload.php) in your regular file and get access with class name of the packages.

      Please share your thoughts, questions on this article. If you need further assistance, in installing composer on Ubuntu, please don’t hesitate to contact us.

      cmsMinds is a web development agency based in Raleigh, NC. Apart from helping on cms projects, we have expertise on custom web development using PHP. If you need help with one of your existing projects or architecting a new application one of our team members can definitely help you with the road map.

      Recent Blog
      VIEW ALL BLOGS